
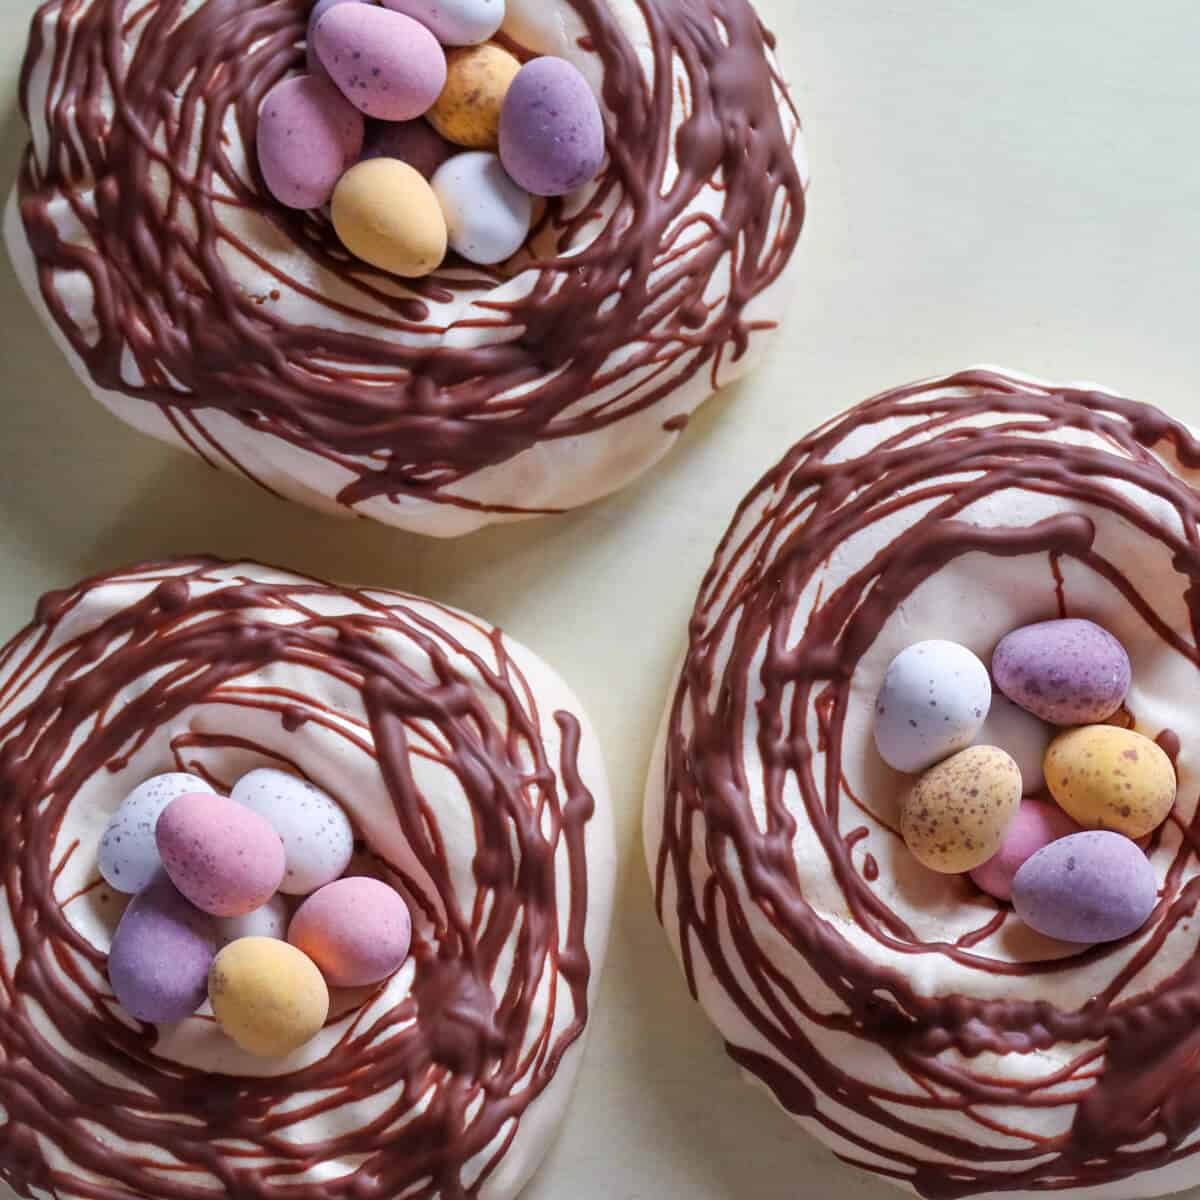
Chocolate meringue nests make the perfect Easter treat and double up as decorations! These Easter chocolate nests are sweet and crunchy and look so cute, filled with eggs in Springtime, especially on Easter Sunday (or the whole Easter weekend).
Making meringue is second nature to me now, and this easy meringue recipe is perfect for making chocolate meringue nests. To create a nest effect, I use melted chocolate piped over the top of the nests, and included below is a video of how to make a piping bag out of baking paper that is the ideal small size for piping chocolate.
Meringue is made by whisking egg whites and sugar together before baking at a low temperature. We allow it to dry out before decorating, and the result is a crunchy exterior that holds its shape really well.
Jump to:
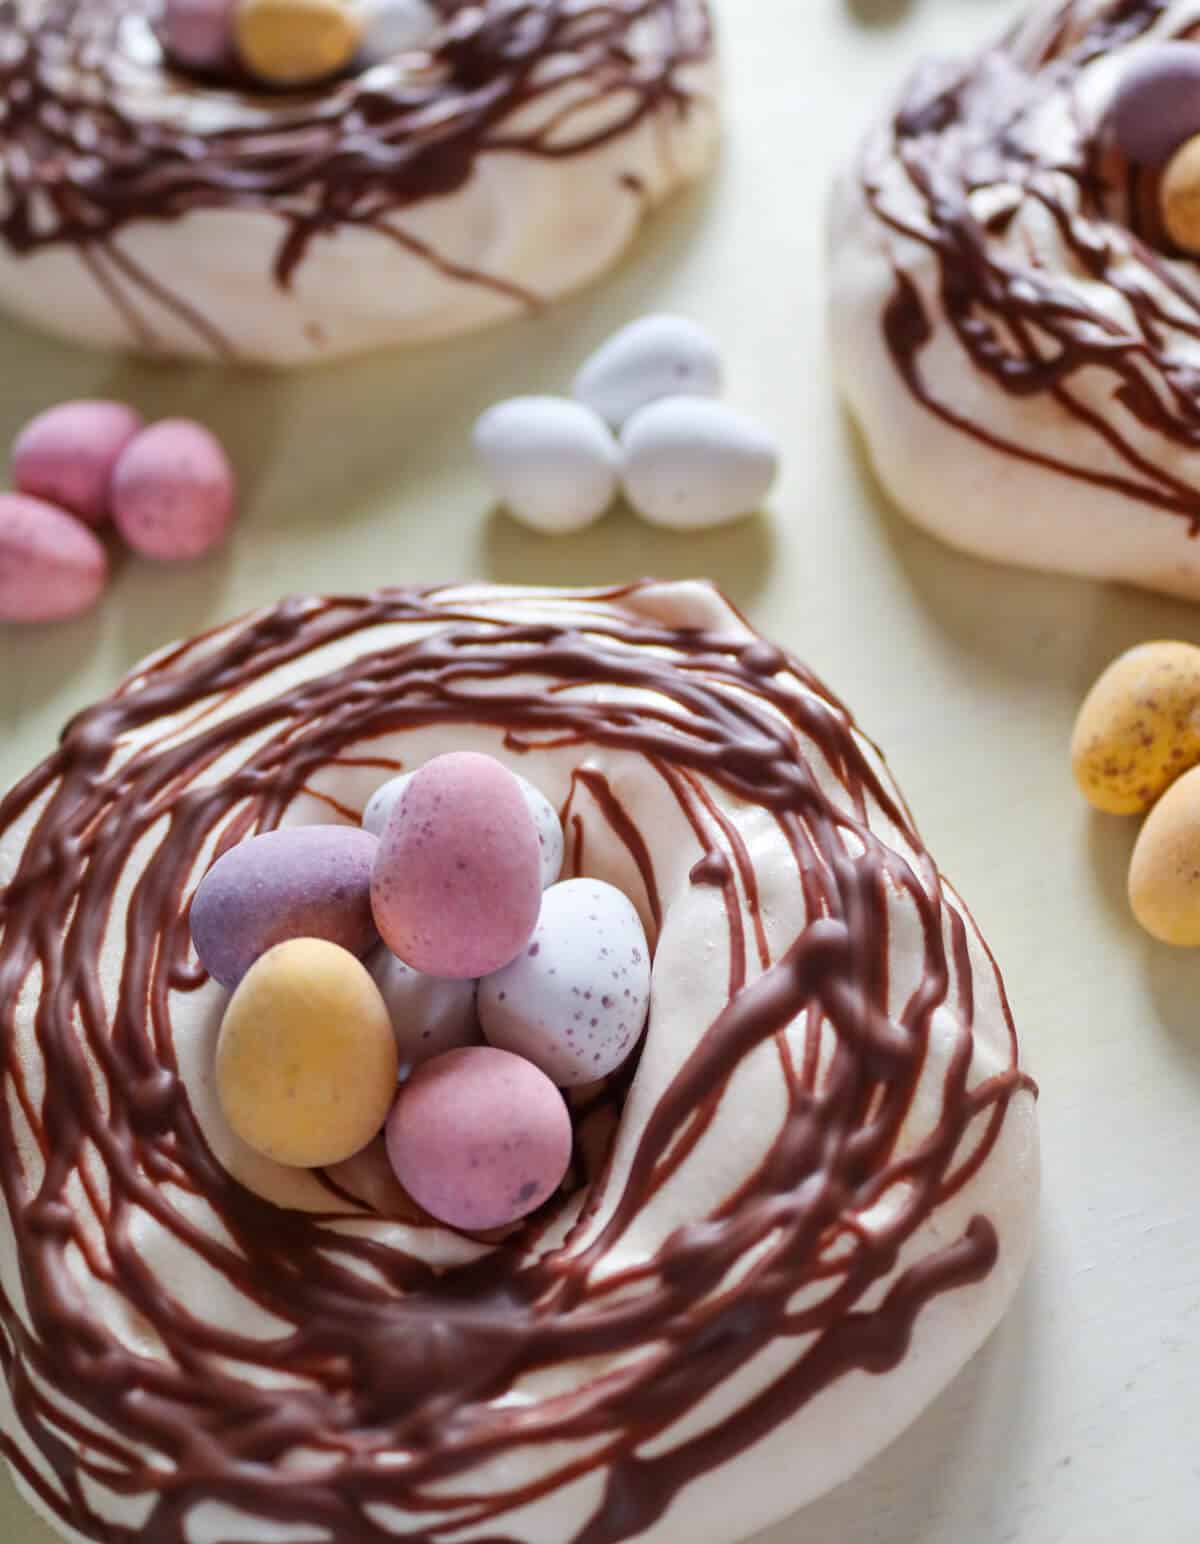
These easy meringue nests are ideal for Easter, where they can double up as decorations and dessert! I put them out on the Easter dinner table filled with little Easter eggs, and then at dessert time; guests can dig in. Why not fill the center of the chocolate meringue nests with whipped cream and top with some more chocolate shavings?
Why you will love these cute meringue nests
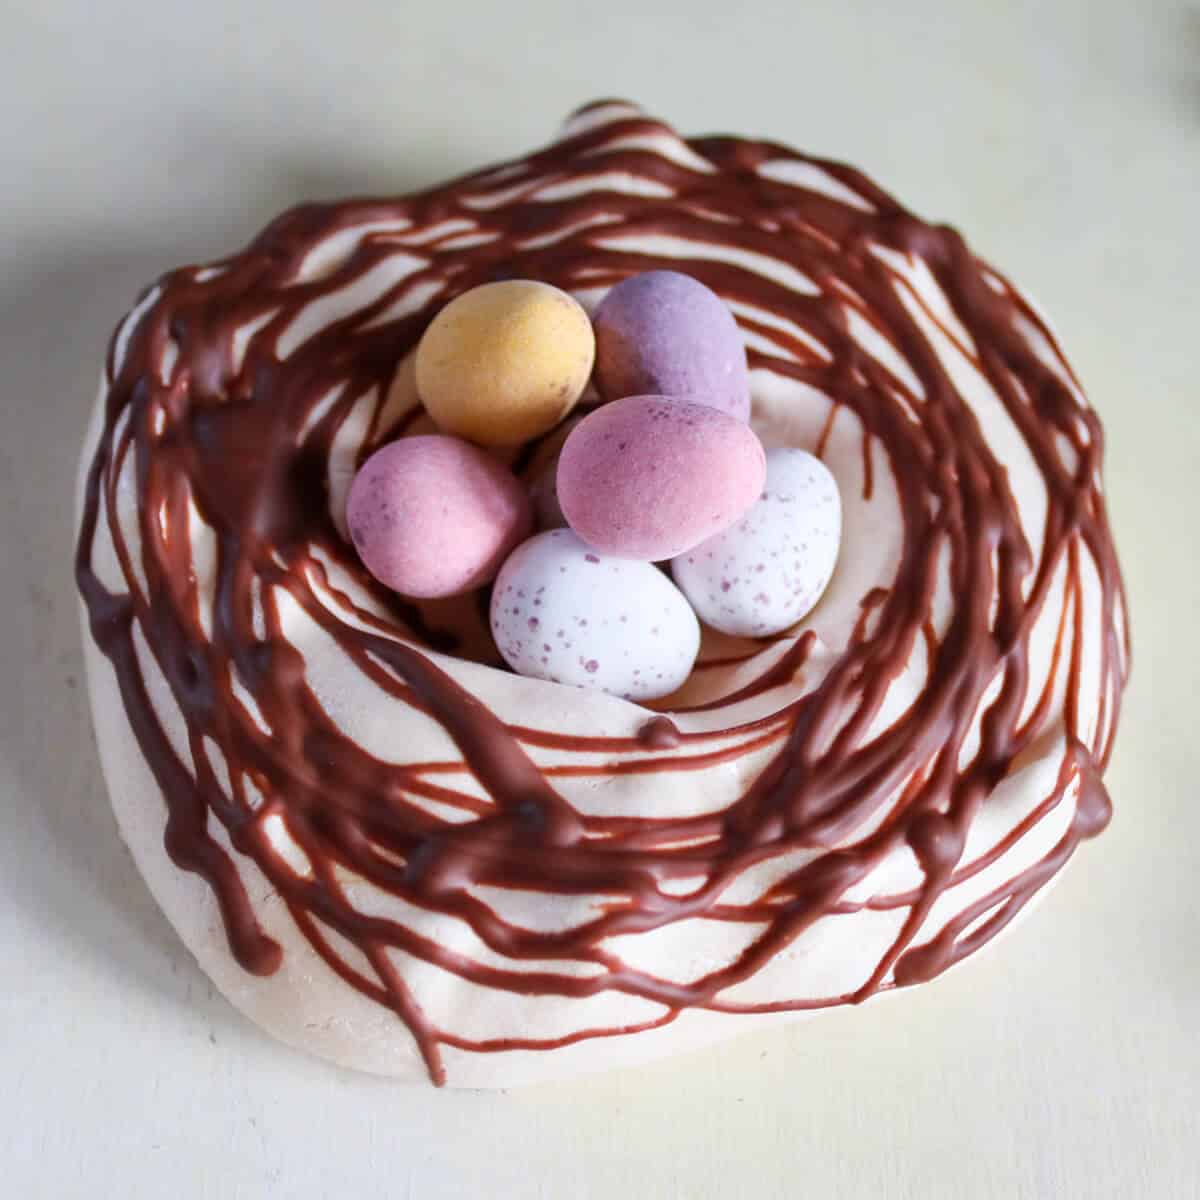
- Versatile and Adorable Presentation: These mini chocolate meringue nests are not only delicious but also visually appealing. The nests can also be piped using a large star tip to create various nest shapes, adding a cute touch to your dessert table. I filled mine with mini chocolate Easter eggs for an adorable Easter-themed treat, but you can also fill them with fruits, such as fresh berries or sliced fresh fruit. They are perfect for any sweet dish, from light desserts to special occasions.
- Easy to Make with Basic Ingredients: You don't need fancy ingredients, and there is no extensive prep time to make these adorable meringue nests. The recipe is straightforward, and you'll achieve the best results by following my easy step-by-step instructions. These chocolate meringue nests are accessible to everyone, a beginner or an experienced baker.
- Festive Easter Treat: The individual meringue nests, adorned with colorful mini eggs, make for a perfect Easter-themed dessert. Whether served at a family gathering or an Easter brunch, these chocolate meringue nests will add a touch of sweetness and charm to the celebration, making it a delightful addition to the festivities.
Ingredients
Here's how to make easy chocolate meringues for Easter.
- Eggs: I used egg whites only. Make this Creamy Sage And Pumpkin Tagliatelle recipe with egg yolks.
- White granulated sugar: Although I used granulated sugar, you are still welcome to use icing sugar or caster sugar.
- Chocolate: I melted chocolate to create the nest effect on these meringues. If you add cocoa powder to your meringue mixture, consider using milk chocolate for color contrast.
See the recipe card at the bottom of this post for full quantities and to print this recipe out.
How to make Chocolate Easter meringue nests
- Preheat the oven to 120 degrees Celsius / 250 degrees Fahrenheit and line a large oven tray with non-stick baking paper.
- Make your meringue by separating the egg whites from the egg yolks. Take extreme care to not get any yolk into the whites, even a tiny speck of yolk in the white will result in a failed meringue.
- Whisk the egg whites until they are pale and frothy with soft peaks. Slowly add the sugar until you have a glossy, silky, and opaque white mixture that is fully incorporated.
- Spoon the mixture onto it in small nests. Use the spoon to create a dip in the centre of the glossy meringue nest.
- Sprinkle some extra sugar over the top of the meringue nests to create a slightly browned and extra crispy exterior.
- Bake the mini meringue nests in the oven for 1 hour before turning the oven off and leaving until it has completely cooled. This allows the meringue nests to dry out.
- Melt your chocolate and spoon it into a small piping bag. Cut the end off, leaving a very small opening.
- Create your chocolate meringue nests by drizzling the melted chocolate over the meringue nests in a circular pattern to emulate sticks and branches.
- Leave the chocolate meringue nests to dry and then enjoy!
How to make a piping bag for melted chocolate decorations
- Cut a rectangular strip of baking paper/greaseproof paper and then cut it into a triangle with one long side and two short sides.
- Roll into a cone, adjusting the edges so that the tip is completely closed.
- Fold the edges over each other to fix them in place.
- Place 2-3 tablespoons of melted chocolate into the piping bag.
- Cut 1mm from the tip and pipe away!
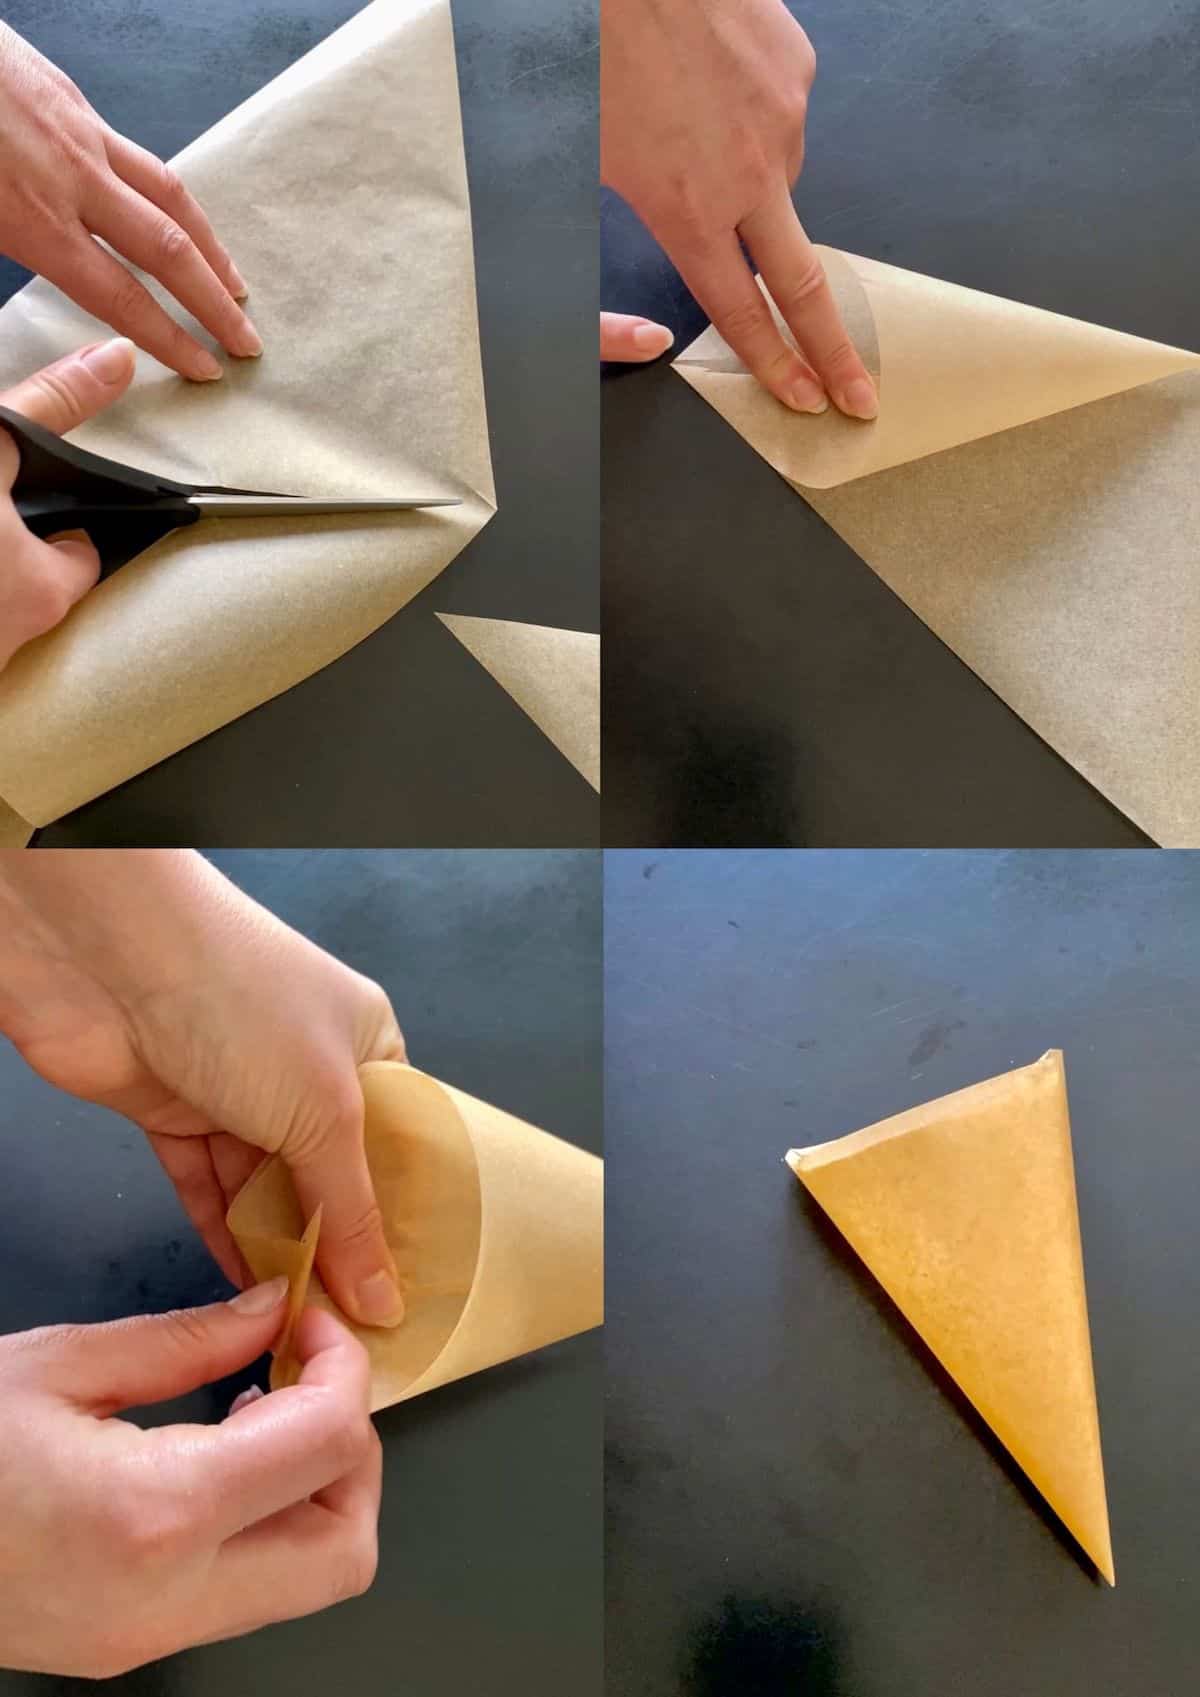
Watch this video to see me making one in action.
Hint: Decorate your chocolate meringue nests on the baking tray, as you'll inevitably get chocolate in a few more places than planned, and it creates a lot less washing up!
Meringue nests filling ideas
- Fresh sliced fruits with Salted Caramel Sauce and Chopped Nuts
- Fruit Compote
- Chocolate Ganache
- Lemon Curd
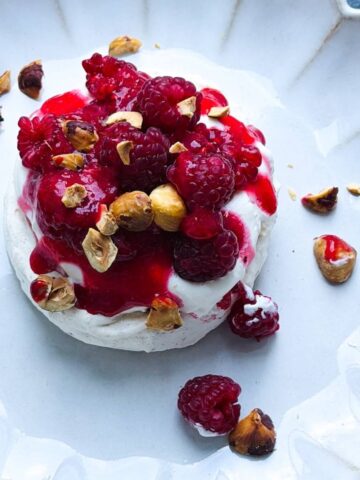
- Whipped Cream and Berries
What is the best way to melt chocolate?
You can melt chocolate in several ways
- On an induction stove in a saucepan on low heat.
- On a gas stove in a bowl above a saucepan of steaming hot water (double boiler).
- In an oven-safe container at 100 degrees Celsius/ 200 degrees Fahrenheit.
- In a microwave-safe container on low power in 20-second increments.
Variations
Here are some ways you can adapt or change up this chocolate meringue nests recipe to suit you.
- Deluxe - add white and dark chocolate to the mix to really go to town on the chocolate
- Vegan - here is an alternative meringue recipe you can use with aquafaba
- Giant - you can make this into one giant nest to make it a sharing sweet dessert.
Like meringue? Try an Eton Mess or this rhubarb and pistaciho pavlova.
Equipment
To make these chocolate meringue nests, you will need:
- Mixing bowl
- Food processor or electric mixer with whisk attachment (I have a Kitchen Aid)
- Baking tray
- Non-stick liner (I use this re-useable liner)
- Baking paper or piping bags
Storage
You can store the chocolate meringue nests in an airtight container for up to a week.
Meringue freezes well - but best to wait to decorate them until after you have defrosted.
Top tip
The rule of thumb is to use 50 grams of sugar for each egg white, so you can scale this chocolate meringue nest recipe up or down to suit you.
Frequently asked questions
I personally find that using prepackaged egg whites from a carton never yield good results when making meringue. I prefer to use whole eggs and then use the yolks to make ice cream or mayonnaise!
Yes! It's easy to whisk meringue by hand as long as you have the right equipment, I had to whisk egg whites by hand at chef school all the time. You will need a large bowl and a large balloon whisk. The size of the whisk is very important, you won't get enough air into the mixture otherwise and will only end up with an aching arm.
Meringue nests made using the basic French meringue recipe can last for about 1 to 2 weeks if stored properly in an airtight container at room temperature. However, their shelf life may vary depending on the humidity of the environment.
Yes, meringues will indeed harden as they cool and age in the fridge, resulting in a crisp meringue texture.
More Desserts


Recipe

Chocolate Meringue Nests
Equipment
- 1 large baking tray
- 1 non-stick baking liner
- 1 small piping bag
Ingredients
- 3 egg whites
- 175 grams (6 oz) white granulated sugar
- 90 grams (3.17 oz) milk chocolate
- 1 tablespoon white granulated sugar
Instructions
- Preheat the oven to 120 degrees Celsius / 250 degrees Fahrenheit and line a large oven tray with non-stick baking paper.
- Make your meringue by separating the egg whites from the egg yolks. Take extreme care to not get any yolk into the whites, even a tiny speck of yolk in the white will result in a failed meringue.
- Whisk the egg whites until they are white and frothy with soft peaks. Slowly add the sugar until you have a glossy, opaque white mixture that is fully incorporated.
- Line a baking tray and spoon the mixture onto it in small nests. Use the spoon to create a dip in the centre of the meringue nest.
- Sprinkle some extra sugar over the meringue nests to help them brown sightly and crisp up.
- Bake the mini meringue nests in the oven for 1 hour before turning the oven off and leaving until it has completely cooled. This allows the meringue nests to dry out.
- Melt your chocolate and spoon it into a small piping bag. Cut 1mm from the tip, to leave a very small opening.
- Create your chocolate meringue nests by piping the melted chocolate over the meringue nests in a circular pattern to emulate sticks and branches.
- Leave the chocolate meringue nests to dry and then enjoy!


Helene says
These chocolate meringue nests were so fun and easy to make and made great Easter decorations as well as a yummy dessert! Thank you so much for the recipe
Louise says
Easter is my favourite time of year so getting some practice in making these super delicious meringue nests!
Toby says
Delicious and fun! We made these nests with our daughter and we all loved them! Thanks so much!
Charly says
Really fun & easy to make & look so fabulous too! Thanks!
Ashley says
This is a fun and cute Easter project, and a great treat!
Jean Nie says
they look absolutely adorable and perfect for Easter, kids will surely enjoy these mini chocolate meringue nest treats.
Kat says
Such a pretty dessert for Easter!
Chris says
These chocolate nests are perfect for Easter! I'm saving this recipe for later!
Giangi says
A fantastic idea for Easter. Thank you for all the explanations, make life easy when you are not a baker.
Thank you for sharing.
nancy says
such a cute idea and it tastes so good too! it was a lot of fun making it now that spring is in the air
Shelby says
The perfect place settings and individual desserts for the kids table at Easter!
Andrea says
perfect for easter! cannot wait to make these for the holiday. kids will loveee them!
EMILY says
These are the cutest little nests I've ever seen...how clever! I can't wait to make these for Easter this year!